MY POCKET CRUISER LITTLE SQUIRT TOO- REPAIRS AND MODIFICATIONS 2005
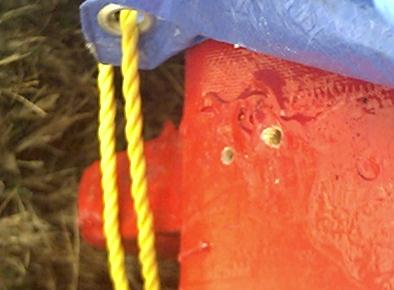
02-Jan-05 Went to the compound where I store Little Squirt Too to check that she's all right. I decided to walk up because the road to the compound is not plowed and I was afraid the car would get stuck. Besides I needed to get out of the house. I walked up and entered the compound. I still couldn't see Little Squirt Too but off in the distance I could see the tounge of a trailer sticking up in the air. I couldn't run because the ground was too slippery, but all I kept saying to myself was “please God don't let that be my boat.” Unfortuantely it was my boat. I had two tarps on yet somehow the cockput had filled with water and frozen. The weight had tipped Little Squirt Too back until the transom was resting on the ground where she then froze to the ground. I tried and tried but I could not move her. Now I had a problem. I can't get the ice out. When it froze it expanded and possibly damaged the hull, but there is nothing I can do about that now. However every time the water thaws and refreezes it will cause more damage. I have to fix it so that is the water thaws it can drain out of the cockpit. I planed on installing a drain come spring. I should have installed it already. I've had the parts purchased for about a year. I originally bought them to install a drain on Little Squirt. My 3-in-1, but never put them in. Glue won't work at this temperature, but I can drill a small hole in the back of the transom where I will be installing the drain to get rid of the water should it melt.
06-Jan-05 Returned to Little Squirt Too to drill my hole.
Here's a picture of the inside of the cockpit.
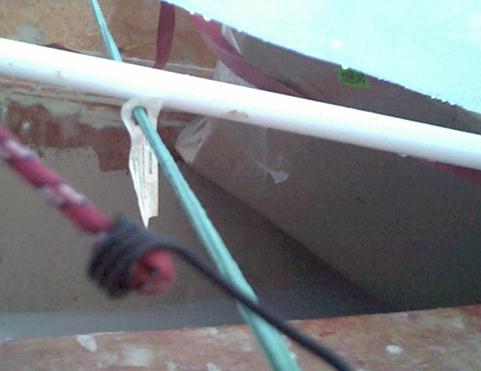
Here's the temporary hole I drilled. The first one I drilled went into a board in the cockpit and will not drain the water. I had to drill a second hole.
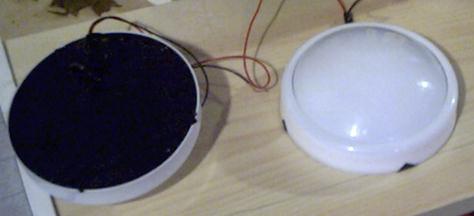
Saturday 22-January-2005 Since yesterday evenin I have been working on interior lights for Little Squirt Toos cabin. I read a article where a gentleman talked about using the cheap lights they sell in dollars stores. You know the ones that turn on and off when you push on them. They each run on six volts. If you wire two of them in series they can be hooked up to a 12 volt battery. I plan on installing two sets of lights. Each set consisting of two lights. The reason for this is that should one light in a string fails the other light will fail as well, because they are wired in series. Remember the old xmas lights and the torture of trying to find which one had died.
First I got the each light and opened up the battery compartment. The cover has two little tabs on one end and a big tab on the other that hold the lights in place. Break off the big tab. This leaves a opening for the wires to go through. Then you need to solder the wires to one particular plus terminal and one particular minus terminal. I purchased a cheap six volt flashlight battery. Attached two wires to it and tried the various spots in the light until I found the right one. Attaching the wire to the plus terminal is easy. There is a small spring on this terminal. I simply intertwined the wire with the spring and soldered it in place. Attaching the negative wire is a bit more complicted. There is nothing to attach the wire while soldering. I twisted the end of the wire into little circles. Like the element on a electric stove top. This provides as much surface area as possible for where the wire attaches to the light terminal. I then used a tiny piece of tape to tape the wire down in the light so that the loop I made is pressing against the terminal with some pressure. Make sure not to put the tape too close to the loop you will be soldering there. I then soldered the second wire into place..

Remember the big tab you broke off the cover. Where that tab was there is now a opening you can use to run the wires out of the light. Carefully tape the wires together at the spot where they will be exiting the light and tape them to the light itself. Tape the cover back into place. Then tape everything so it does not move. You do not want these wires being pulled on.. Once you have two of these you can wire them up in series and attach then to your 12volt battery.
Note: In case anyone does not know. Running the lights in series means you attach a wire to the battery. That wire runs to one of the terminals of one light. The next wire runs from the second terminal of that light to the first terminal of the second light. Finally a wire runs from the second terminal of the second light back to the battery. I could be wrong but I believe that because this is just a simple light weather you use the positive and negative terminals and how they are linked up is not important.
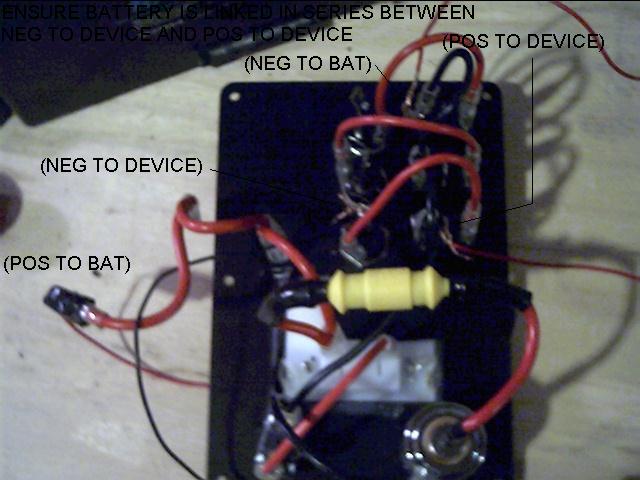
Sunday 12-Jan-2005 I decided to take the various components of Little Squirt Toos Electical system and see how it works on a workbench. No matter how I wired it the electrical panel would not work. I had to change the wiring of the box for it to function. Here is the wiring arrangement I used. As you can see the Pos To Bat wire is the wire I pulled off of the three terminals I pulled off of the plugs which are now Neg To Bat. With this arrangement all the functions of the box works. If anyone know why I could not get the box to work without these changes please let me know.
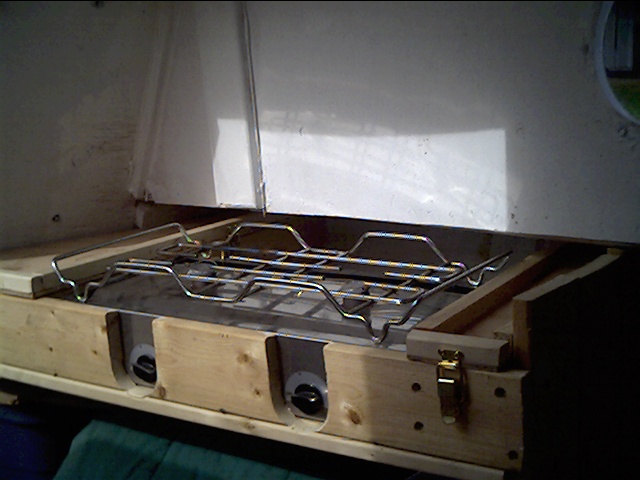
Friday 02-Feb-2005 Received a alcohol stove I bought on E-Bay. It ended up costing me about $100.00 Canadian. It also didn't have any instructions. Couldn't find any instructions on the internet. The stove is a Almatic stove which is a canadian company. Couldn't find any sign of it on the internet. I guess they are out of buisness. I figured it out though. I filled it up and had some water boiling in about 8 minutes.

Sunday -01 May 05 Well here is the status of Little Squirt Too up to this point. I drilled a larger hole in the back of the transom and installed a brass drain. I also installed a permanent cable from the battery compartment to the starboard storage compartment in the cockpit. I used a ordinary exterior wall socket to plug the engine into and attached a 110 volt plug to the end the the engine cables. We'll see how well this works. I also bought a second deep cycle battery to mount in the boat. I now have a lot of sanding and painting to do. However Little Squirt Too is now functional.
24-Jun-05 Well here's the status up to now on setting up Little Squirt Too. I have removed the boat from the storage compound, and am storing it in the driveway in front of the house. We are paking the van on the road. This is speeding up work considerably. I've replace my old deep cycle battery with a new one identical to the one I had bought earlier, but had not yet used. This means I have two identical batteries. They can be linked together in series which will supposedly improve performance. I've also finished installing the two solar panels. I've run the wiring to the sockets I installed to plug the engine into in the cockpit. I then attatched a ordinary wall plug to the solar panel wiring. I can now just plug and unplug the solar panels as require. I also installed a wall plug onto my multimeter cables. I can check the battery voltage without having to leave the cockpit of open the battery compartment in the front of the cabin. I've also installed the electrical panel that goes over the battery compartment. Although I have not yet installed any of the wiring for the panel to the battery. I need a couple of bus bars, but I will get to it.
My little girl is trying to help me. She is four years old now. She wants to hold the tools. She has to make constant trips to and from the house, which requires her to be lifted into and out of the boat. Although it slow down the work considerably having her around is worth it.
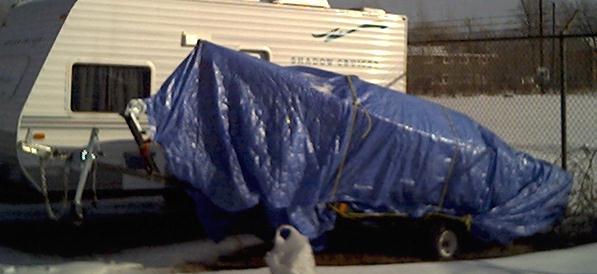
21-Oct-05 Well the Little Squirt Too is covered up with tarps and put away for the winter. I guess now would be the time to sum up what I have done with her. I've painted all the areas that were previously unpainted such as the rub rails and the cockpit. I also put more paint on the areas that just look bad. I've sanded off the extra epoxy causing the destruction of a few pairs of pants on that was hanging off the rubrail and was as sharp as knifes. I installed doors on the hatchway to the cabin, and epoxied the storage box inside and around the outer edge to stop a annoying leak. I put the name on the boat. Although it is not what I originally wanted to call her Little Squirt Too just seems to grow on you.
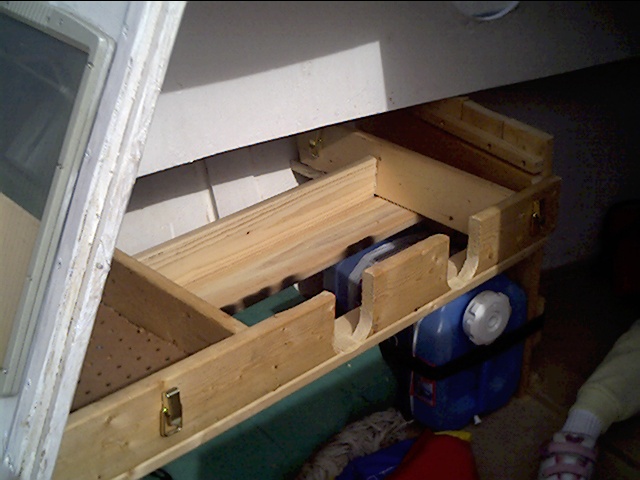
I also built a kitchen shelf to hold my stove as well as some other kitchen items in two small storage compartments on each side of the stove.