Little Squirt Too Assembly
Sunday
March 14,2004 - Installed the Transom. I am convinced that the proper
angle for the transom is 5 degrees. We temporarily put on the top
deck and layed the transom in place then measured the angle and it
was 5 degrees. There is also a diagram in the boat plans showing that
the opening for the engine is cut at a 5 degree angle. I beleive this
is to cancel out the 5 deg angle of the transom.
I
then used a four inch piece of board mounted to join the two top deck
panels at the top deck panels just back enough from the front so that
it doesn't get in the way from mounting the top panels to the stem.
Once I did that I took a long board and temporarily
clamped it to the two deck panels at the back. I did this in order to
make it easier to lift. I lifted the panels at the stem and my wife
lifted at the sten using this board I had clamped and we lifted the
top panels into place. I then put screws in too hold it in place. I
did not glue the transom or the top panels because I will have to
disasseble all of these parts to take the boat out of the basement
come spring.
In order to fit the top deck to the stem I had
to dryfit the top deck and then carefully measure the angle that it
was at laying on the stem. I then had to recut the stem at that angle
on the top so that the top deck rested properly on the stem.
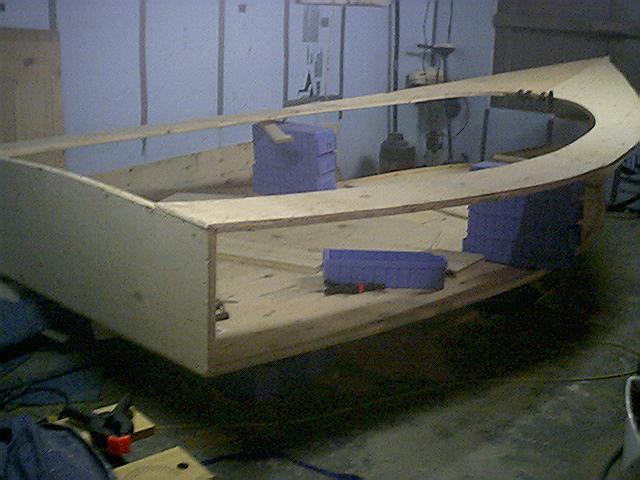
Monday
15 March 04 - Officially went 3D sort of. I first mounted the forward
bulkhead. I acheived the required 92 degree angle by putting a fairly
heavy square box right on the line where the bulkhead was to go. I
then rested the bulkhead against the box and screwed in the bottum
screws, but I didn't tighten them completely. I then wedged a piece
of foam between the box and the bulkhead. I now had 92 degrees. I put
in the screws through the top deck into the bulkhead. Then tightened
the screw at the bottum.
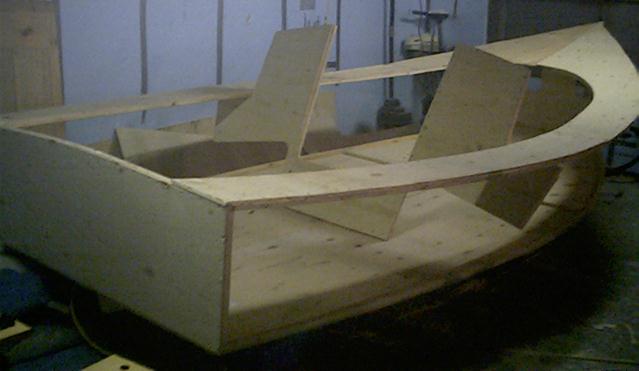
I had a lot of trouble putting up
the cabin bulkhead. I'd put it up and it won't fit. Take it down cut
here and there. Put it up, take it down. You get the picture. I
finally did get it up. It's a shame I couldn't glue any of this. I
have to take it all apart again in order to put it outside come
spring. I can now start work on the odds and ends which won't have to
come apart.
Friday
10-Oct-2004 I haven't been keeping my site up to date for a while so
I'll try to keep up here. I'm being posted to Ottawa so I now have to
finish the bulk of the work before I leave. I plan on trying to keep
the site up to date, but I probably won't be able to keep up with the
same detail as before.
I've installed the mast mount on the
lower deck. I've decide not to build the mast box in the Pocket
Cruiser plans. Instead I am installing the mast mount as is described
in the book "BOATBUILDING FOR BEGINNERS AND BEYOND". I
checked the video for the weekender where they discuss the mast box.
They admit it is overbuilt so that you can put up the mast in rought
weather. I consider the benifit to be insufficent for the cost of
having a enclosed box that is hard to service and prone to rot. The
setup I'm putting in is a mount on the lower deck and a reinforced
opening in the top deck which the mast runs up through.
I'v
also installed the gusset which goes on the stem onto which the side
panels are attached. I will describe the process I used to make it.
First unless you think you built the boat perfectly to plans the
angles for the top and the bottum of the gusset in the plans are
useless. I used a tool called a SLIDING-T-BEVEL to measure the
angles. First I drew a line from the front of the top deck to the
front of the bottum deck on the stem. I then used the SLIDING-T-BEVEL
to measure the angle of the bottum deck to this line. I then used the
SLIDING-T-BEVEL to measure and cut the same angle at one end of the 1
x 4 inch board used to cut the gusset. I then did the same process to
make the angled cut at the top of the board. I had to do some sanding
on both ends before the board would fit in place. Once this was done
I clamped the board in place against the stem. I drew lines at the
top and bottum of the gusset to show the angle of the stringers at
the top and bottum decks. This is the angle that the gusset has to be
cut down at so that the side panel will attach. I also draw a line to
mark the wood that has to be cut off to make the gusset even with the
rear of the stem. I removed the gusset and repeated the process for
the gusset on the other side.
The plans say to set your blade
at a 45 deg angle to create the edge that the plywood side panel will
attach to. I had no problem with this angle, but I was very carfull
to ensure it did not cut off too much of a angle at either the top or
bottum of either gusset. I ran to through the saw to make the angle
then I used a jig saw to cut off the extra wood at the aft part of
the board to make it flush with the rear of the stem.
I then
glued and screw the gussets to the stem. When I counter sinked the
screw I made sure to make then extra deep so that when I sanded the
gussets to shape I would not sand the screw. I then used a belt
sander which I had recently purchased to shape the gussets. I found
the gussets much easier then I thought it was going to me to build.
I am now working on a idea of my own. I am building a small
box in the boat that I will use to operate a small alochol stove in.
I will line it with ceramic tiles to prevent a fire should it tip or
flare.
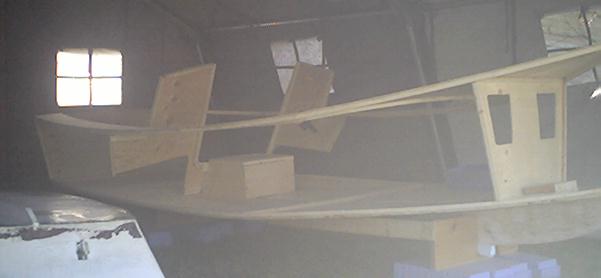
17-May-04 Have borrowed two sections of modular tentage from work. Have moved Little Squirt Too outside and reassebled it using glue.
26-May-04 Have painted the insides of the forward compartment having installed the port panel. Still need a second coat.
27-May-04 When I installed the bulkhead in the bow there was a gap on the port side between the bulkhead and the hull. I was concerned about drumming of the hull so I made a wedge. This is where you take a small piece of wood and carefully use a sander to shape it too the size and shape of the gap. The trick is not to make it too big or too small. Too small and it won't stay in properly. Too Big and it will separate the seams in the area you are forcing it in. You should be able to insert it with very light taps of a hammer. If you need more force then that it is too big.
