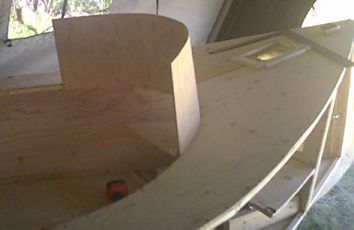
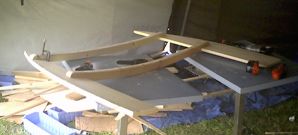
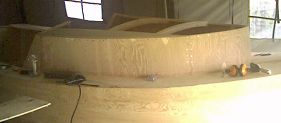
24-May-04 Have attached the side panels. Found them extremely difficult to attach. If possible you definitely should get help with this part. One person to drill and screw and the other to hold the plywood board in line with the stringer.
Little Squirt Too Cabin
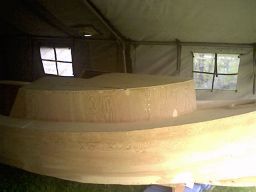
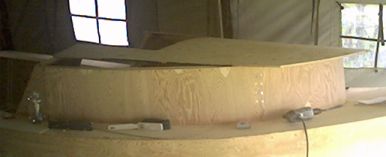
24-May-04 Have installed the front panel of the cabin. I didn't have any trouble at all which surprised me. I always hear about people having trouble with the bending of the panel. The only thing I can figure is that the complaining is about the weekender which is narrower and would have a sharper bend. My cabin walls are 1 7/8 larger then the plans call for. I was trying for 3 inches, but did not calculate for the angle that the cabin bulkhead leans at when I did the calculation. Oh Well.
24-May-04
Have attached the side panels. Found them extremely difficult to
attach. If possible you definitely should get help with this part.
One person to drill and screw and the other to hold the plywood board
in line with the stringer.
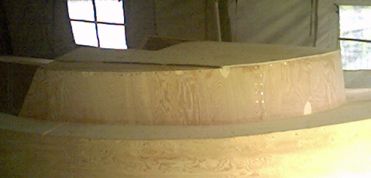
26-May-04
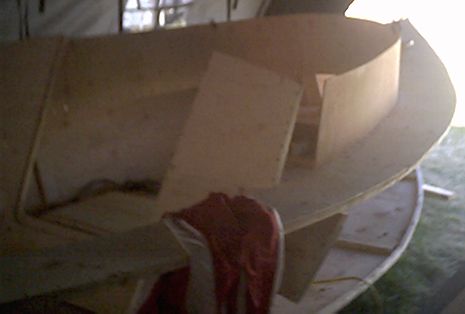
Installed the final panels yesterday. The plans call to install the
stringers at the top of the panels and then the panel joiners. I have
decided to do the joiners first. When I test installed one of the
stringers I was not happy with the stress on the panels when they
were pushed aside. I believe I will have a simpler time with the
panel joiners in place. If you do put the joiners on first make sure
you leave space for the stringer to go on when you measure them. The
simplest way to do this is too take a small piece of stringer and
clamp it where the stringer will go when you glue it in place. I am
also using a belt sander to round the surface of the joiners on the
surface facing the panels in the forward corners of the cabin so that
it gets a better fit.
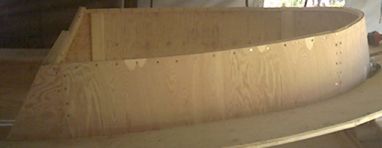
Finished installing the stringers in the cabin. I had to cut kerfs every 3 inches in the stringers. The amount of stress on the top of the panels were something else.
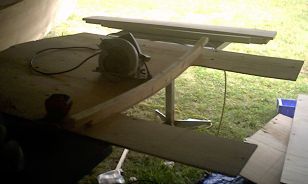
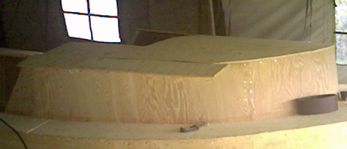
01-Jun-04 Right now I am cutting the aft rafter for the roof. It is cut from 2 inch board so I am cutting it with the circular saw using many cuts instead of one. What I'm doing is making a shallow cut following the line then lowering the blade to make a deeper cut and so on till I cut all the way through the board. Using this method I have cut the aft rafter out, but I still have to cut the notches for the side panels, and the curved parts at the bottom edge. Then sand and start the forward rafter.
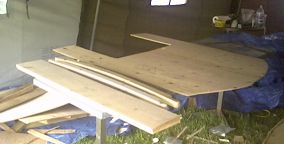
02-Jun-04 I've finished cutting and shaping the aft rafter. I cut the notches with a jig saw and used the lid of a mustard bottom to draw the outline of the rounded tips on the bottom. I then used a router to round the bottom edges. I took a sheet of plywood and cut out the opening for the hatch. My hatch opening on the cabin bulkhead is narrower then the plans call for to make room for the solar panel I plan to install. Therefore I had to cut the opening for the hatch opening on the cabin ceiling smaller as well. I cut it out and laid the plywood sheet on top of the cabin. I then cut away the excess at the front making sure to leave extra wood for adjustment. I will cut it flush after it is permanently mounted. Another problem I had is that the plywood for the roof is curved towards the good side. Since I want it to curve the other way I took two tables and put the plywood with the rough side facing up suspended between the two tables. I then put a few pieces of wood for weight in the middle to cause it to bend the other way. This will make it easier to install. Hopefully.
03-Jun-04 Have cut and shaped the front rafter and the two ¾ inch side panels. I have not yet shaped them only cut out two boards to 8 ½ x 55 ½.
05-Jun-04
Step 1 – Mark the center lines on both rafters and the roof panels.
Step
2 – Install the aft rafter so that the center is lined up with
the center of the roof panel. DO NOT GLUE. Just use enough screws to
hold the panel in shape. You will be removing the panel again later.
To make things easier I put the panel between two tables and put a
weight in the middle so it would sag down. In this case the weight
was my rotory saw.
Step
3 – Place the roof in position and check the way it rests on
the walls of the cabin. You will have to belt sand the walls and
front to ensure a snug fit. Then screw into place using just enough
screws for the panel to hold its shape. Again DO NOT USE GLUE.
Step
4- I marked a line on the outside of the cabin bulkhead. The plans
say something about putting the forward rafter against the ceiling
and finding the best place to line it up. I didn't find any spot any
better then any other.
Step 5- Remove the screws holding the panel in place and put the panel back on the tables. Put the forward rafter 20 inches from the line you had just drawn. I measured from the aft rafter to the forward rafter in order to ensure they were parallel to each other. Screw the panel in place using just enough screws to attach it too the panel the same as the aft rafter. Replace the roof on the cabin.
Step 6 – Put one of the two ¾ inch boards for the side panels and go instide the cabin and mark where to cut. Cut out the panel and place back into postion. Put marks to indicate where the panel has to go. Do the same for the other panel.
Step 7- Remove the panel from the rafters and glue and screw the ¾ inch side panels onto the rafters in the positions you previously marked
Step
8 – Myself and my wife then took this assembly and clamped it
into postion. I then screwed it premanently into place. I probably
should have glued it too, but it did not seem practical to do. It
would take too long and my wife who was helping me also was looking
after our little girl inside and she couldn't stay out very long.
Step
9 – Glue and screw the plywood center panel into place.
Step
10 – I cut two strips of 7 inch wide panel from the leftovers
of the center panel. I will glue and screw These into place and then
trim off the excess. Because it is late in the afternoon, and I need
to recharge one of the drills I'll do this tommorrow. For now I'll
put my tools away and close up the tent for the night.
Sunday Jun-06-2004
Step 11 – Have glued and screwed the plywood side panels into place.
Step
12 – Trim the plywood side panels and voila.