
7-Oct-2002
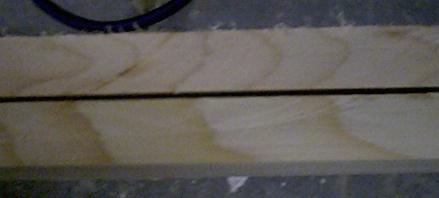
Ordered and received the Pine for the Keel
03-Nov-02
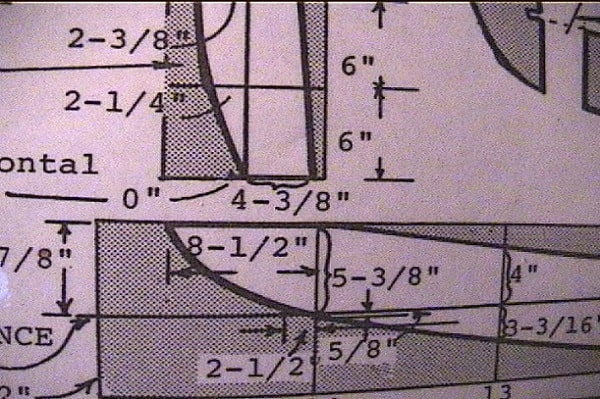
I have cut out the stem and Keel parts and drilled the holes for assembly. I had a couple of difficulties at station 14 in the plans. The spot for the nail at this station is 5 3/8" from the reference line. This is not the edge of the board. There is a second point 8 1/2" forward of this point which is on the edge. Is the line supposed to be drawn between these points or do you follow the edge of the board. Either way the spot to put the stem on will be too large you will have to change the keel in some way to make it fit. I decided that there is a missing point level with the edge of the board and 4 3/8" in towards the aft from the most forward nail which is 8 1/2 inches from the no.14 station. I put a nail for lofting here and it lined up perfectly with the other nails.
I also had a problem with a point 2 1/2 inches forward of the station 14 on the reference line. It just did not line up with the other point for lofting. I removed it and put in at the junction between the No.14 station and the reference line. The points lined up fine.
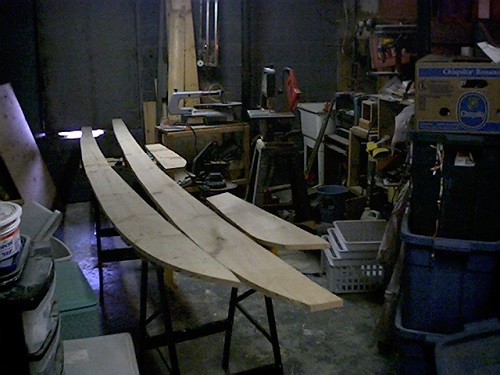
I cut out the keel and used it a a template to cut out the other side of the keel, ensuring that the joining points for the pices were not in the same place.
I then cut out the second side of the keel and drilled holes 4 inches apart and one inch in along the edges on one part of the stem and keel. I am putting some extra screws in where the keel is fattest. I am hoping to avoid the boards coming apart down the road.
 |
| Here is What I Have Done Up Till Now |
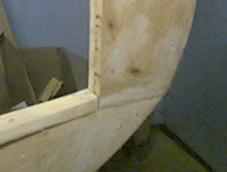
10-DEC-02 For now I quit as far as the Keel is concerned. My basement is too cold to use glue in so I have been planning to strap it to the roof of my van and bring the whole thing to the warehouse where I work and do it over the weekend. Three snow storms and a stomach flu later it was still sitting on the floor, and as long as it is there I can't do anything else either. So I have hung it from the ceiling, and now I am going to cut out the bulkheads.
| Keel In Storage |
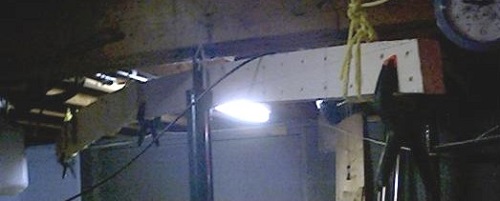 |
| Another Pic of Keel In Storage |
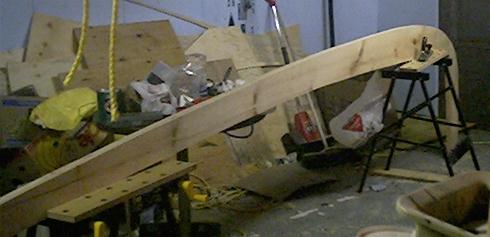
07-JUN-03 Finally glued the Keel. I used Dural Marine glue and 1 inch screws. The plans called for 1 1/2 inch screws but I felt they would be sticking out on the other side which was a problem I had with most of the 3-in-1 I have already built.
One problem is that I found the area that the two sections of keel overlap to allow them to join together is very small. I may have to reinforce it somehow. We'll se. Also when I was putting in the screws the keel came off the support. There was a small gap between the two bottum boards. I hit them with a mallet till the gap closed. We'll have to see if I am going to pay for this later. I then cleaned off the extra glue with some papertowel. I am now going to wait the full 48 hours.
09-JUN-03 Well I finished the keel and mounted in for shaping. I used pine for the keel because I could not get fir in a wide enought size.
I have a problem. There are a couple of gaps in my keel. I beleive that they are caused by slight warps in the pine boards I used. Pine does not hold screws well so they might not have had enough force to compensate for the warpage in the boards.
I beleive the best solution to the problems would be to shape the bottum edge of the keel and use marine bondo to seal it on that side. I could then turn to keel over and fill the other side with some thin filler. The gap is very small so I might get away with just filling it with glue, but I may use epoxy. I may have to drill small holes in the slot into the game I am pouring into to make the opening wide enough to pour into. I don't beleive the gaps cover enough of a area to significantly weaken the Keel. My main concern is open area inside the keel could accumulate water and cause rot.
20-Aug-03 As of now I've filled in the gap in the keel with the same wood glue I use to glue the keel together. I've rounded off the bottum edge and filled in the screw holes with marine all purpose puddy. I hated filling in all the screw holes in the 3-in-1 I built so this time I'm filling them in as I go instead of all at once at the end.
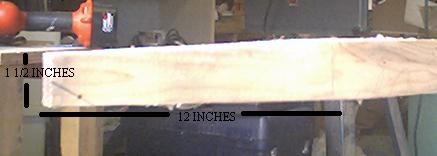
I used the sure form sander to even the top of the keel then I purchased a 16ft piece of 1*3 Spruce to make the cap. It was 3 1/2 inches wide so I had to trim it down to 2 1/2 inches. The front edge of the cap had to be at the same angle as the angle between the stem and the keel. I used a sliding T-Bevel to cut it to the same angle. I then pointed the front of the cap so that it started to narrow 12" from the front edge of the board and became 1 1/2 inches wide at the front.
 |
| My Keel Cap |
You may notice the tip of my Keel Cap is a little uneven. Every time I trim one side to even it out I cut off too much and have to trim the other side. I decided to leave it before I cut off too much. Like the barber with the sideburns who cut them off completely trying to even them out.
28-Aug-03 Have installed the Keel Cap. The instructions say to put in a screw every 3 ft then add screw every 5 inches alternating between the two keel boards. I did not beleive the cap would follow the keel properly so I put the glue on both the keel and the cap and starting at the front put in the screws every 5 inches and worked my way to the stern. I did not put in the 3 ft screws.
To clarify something I found confusing in the plans I have included a picture of the cap as it go against the stem. It is angled the same as the angle between the stem and the keel. A sliding T-Bevel is a nice tool for doing the angle. The notch is not yet cut. This notch goes in after the cap is installed and above it. It is strickly for the bottum plywood panels.
05-Sept-2003 Used a Jig Saw to cut out the notch for the keel. It turned out to be much easier then I expected.
Now that the notch is done. So is the keel. Next is assembling the bottum deck.