Little Squirt Too Rigging
Thursday 06-Jan-2005 My wife got me some wood and I begain lofting the rudder for Little Squirt Too.
Saturday 08-Jan-2005 Cut out Rudder, and begain lofting leeboards. I will use the plans for the Pocket Cruiser as per Stevenson’s except I will make it 42 inches long instead of the 40. This is because of the extra area I will need for the leeboard top. However I will shape the top like the leeboards are shaped in Boatbuilding for beginners and beyond by Jim Michalak.
Monday Dec 04 2006 Well talk about putting things off till tomorrow. I shaped the rudder the best I could. I found the plans very vague as far as the shape of the rudder was concerned. I am following the plans fairly closely except for one point. The plans call for a line to hold the rudder down. This means that the rudder will not automatically flip up when it hits a obstruction. My 3in1 had a similar set up and broke apart at one time for no apparent reason. Looking back I believe the rudder hit a rock and since it could not flip up the impact was transmitted throughout the whole assembly.
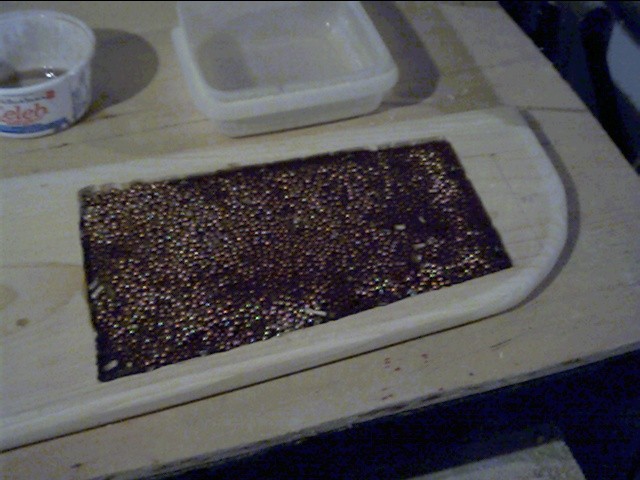
According to the rudder design in Jim Michalak's Boat building for beginners and beyond he recommends lead poured into a opening cut into the rudder so that it well sink and won't need a tie down line. I like the idea but melting lead scares me. Not to mention the fact that lead can be a very difficult metal to acquire. I purchase 4.4 lbs of pellets for BB guns. It cost me about $15.00 at Canadian Tire. The steel pellets are also coated with copper which should help prevent rust should any moisture get through.
I've cut a fairly large opening to put the pellets into. I will
fill the opening with pellets and seal it in with polyester filler. I
fill thin coat the part of the rudder which goes into the water with
fiberglass and polyester. When I routed the opening the router went
too deep at one point and went all the way through the board. I've
devised a novel solution. I put a CD label on the side of the board.
I fill fiberglass that side first then put in the pellets on the
other side. Then I fill and cover that side. If you are wandering
about the screws in the opening they are supposed to make the poured
metal/polyester filling more sucure.
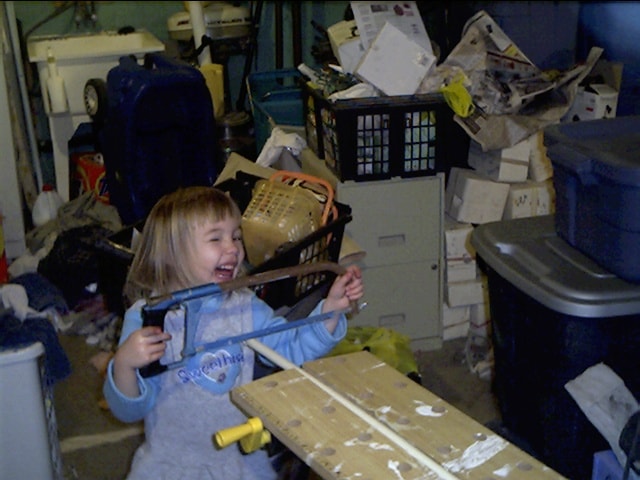
10 Feb 2006-I gave up on the rudder for now. I can't fill the hole with the weight because of the smell from the polyester and the fact that it is too cold to even open a window. I am now working on the gaff. I've purchase two 10 foot lengths of spruce 2*3. One board will be the gaff. I'll cut up some of the other for the yoke. I also bought some dark stain and some super spar varnish. I didn't want to use spruce, but it was all I could get in that length. First I started cutting out the small rings made out of PVC piping which would go on the yoke. I'm doing the cutting however my first mate is demonstrating the technique which seems to work well for me. I am using a fine blade as the cruder ones don't seem to work well.
12FEB2006 As of today I've got the pieces cut for the end of the sparr's yoke and the bolt holes drilled. I've assembled it and once I've rounded the tip I'll sand it and round off the edges. Especially in the interior edges of the yoke. I don't want it digging into the mast when I am using it. I'll take it apart and stain it with 215 Red Oak stain and put a couple of coats of BEHR Super Spar Clear Coat Varnish
20-Feb-06 Got all of the corners routed, the surface stained, and
varnished with spar varnish. Tied the rope in place and coated that
in varnish as well. I'm hoping it will make the rope less likely to
become untied. Of course it could make it brittle and make it crack.
We'll just have to wait and see.
29-Apr-2006 Finished the Boom. I did not like the way that the plans called for to bend one of the pieces of metal in order to make the end of the boom. First I'm not comfortable doing precise metal work. For another thing with one of the metal pieces bent and one straight I would have a great deal of trouble lining up the bolts so they would be flush with the wood. Also I simple could not find the pieces of metal that I required.
I was browsing through a Home Hardware store when I saw some metal parts called mending plates in the area with door mounting hardware. I don't know what they are actually for but a plan sprang to mind I thought would be perfect. I would use the screw holes in the plates for bolt holes. Instead of bending one of the plates I would cut a groove in the board and slide the plates inside. The second plate would lie on top of the boom and I would cut holes which would go through one plates hole to the other plates simular hole then onwards to the other side of the board. I thought I might have trouble cutting the holes since the plate in the booms groove would not be visible. I used the smallest bit I had and drilled as carefully as I could through the first hole aiming for the second. With a very small bit it is not a hard task to hit the spot. I then went up in size. The next higher size bit and so on and so on. The larger bits would follow the holes cut by the first bit and would be pushed aside if it hit the edge of the metal plates hole inside. Here are the pictures of my connectors.
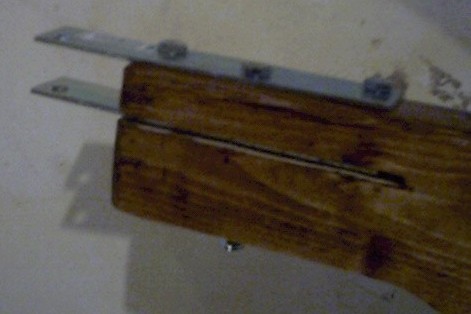

You will notice that I narrowed the height of the boom on the end. I wanted to increase the freedom of up and down movement at the end of the boom. The plates are also slightly off center since the hole in the plate is also off centre in the opposite direction on the plate. My only concern is if the 1/4 inch bolt that is the largest size that will fit through the hole is strong enough. I think it is but, we'll see.
01May06 Well back to the rudder. I poured some polyester in the hole mixed in some pellets and so on and so on till I ran out of polyester. I'll have to get some more and finish filling as soon as possible.
13Jun06 As of now I've been working on the mast. I laminated two 2x4's together with epoxy to make up the required 4x4 board. I did this for two reasons. One it would be less likely to warp then a single 4x4 board and two I couldn't get a single untreated 4x4 boad. All the 4x4s are pressure treated. The instructions called for cutting 1/4 inch off the edges of the mast. I tried one edge this way and found it too difficult to get that kind of precision with a circular saw. I ended up using a sure form shaper to plane the mast to the proper shape. I stained the mast last night and over the next few days will apply spar varnish till I have a few coats. Then I'll start installing the hardware.