21-May-04 I cut out the side panels for the port side of the boat.
The plans allow you to cut out both the front and rear panel from the
same sheet. However I ran into a slight problem. According to the
plans the point at the stem is 26 inches long in the plans. At that
point on my boat it is 26 ¾ inches. If I had cut the board
exactly to plans it would not fit in that spot. However the aft panel
was wider then required on my boat so I cut the aft panel off from
the sheet of plywood but left the extra wood that was between the
forward and aft panels on the sheet of plywood.
Next problem. The plans call for the boat to be flipped on its
side and propped on a couple of chairs. I did this when I built my
3-in-1 Little Squirt and had nothing but problems. Also the weight of
Little Squirt Too and the fact I'm working alone concerned me. I got some
containers and propped them under the panel until it was at the right
height for the front of the panel to press against the stem at the
right angle. I will attach the panel with just enough screws to hold
it in place to both make sure this will work and to mark off where
the glue has to go on the plywood.
21-May-04
Well I have the first panel installed. It was not fun. I used 10
scoops of the glue powder which I thought might be too much but it
turned out to be just enough. I hate panels. I always feel I have too
much too do before the glue sets. It's kind of a organized panic
until the panel is up. Too make things worse just as I was starting
to glue the panel the power went out. I was using two drills. One to
drill the holes and the other which is cordless to put in the screws.
When the power went I had to alternate the bits on the cordless to
finish. Of course first I had to find out that the power had failed.
I did a very fast search for pulled plugs and turned off switches
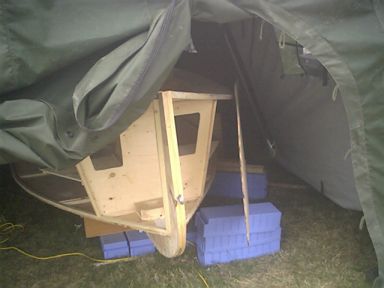
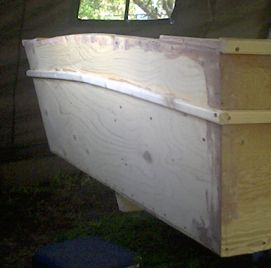
before I realized it was out. Oh well back to the subject. The
systems of using the plastic boxes to hold the panel in place while I
installed it worked fine. Here's a picture.
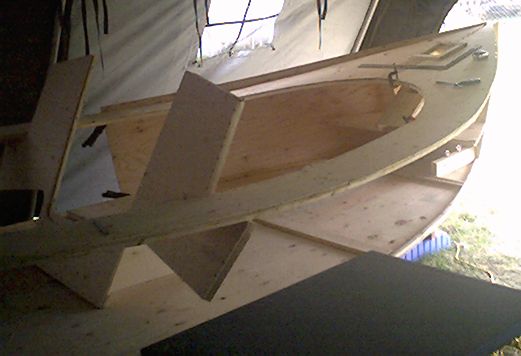
23-May-04
Installed the panel joiner to the rear of the forward port panel then
attached the rear panel. Things went well. No power failures or
anything.
I
learned something when I built my 3-in-1. Once you put on boat port
and starboard walls it is very difficult or impossible to properly
seal and paint the inside of the compartment. Because of this I am
going to install the startboard panels after I have sealed and
painted as much as possible of the bow storage compartment.
28-May-04 Finished installing the panels. Things got interesting.
My countersink drill bit broke in the middle of putting on the rear
panel. I had a spare, but the drill bit wouldn't tighten into the
countersink part. I had to take it apairt and drill the holes with
the drill then drill the countersink with the other part. Not
something I would like to repeat.
17-Jun-04 Started making the rubrails. I couldn't buy any so I'm
cutting a 12ft board into 1 inch strips and rounding the side edges
to make the 1 inch half round.
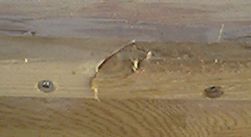
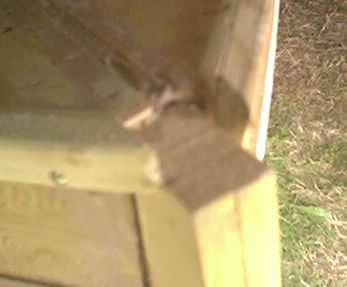
19-Jun-04 Installed the top rubrails. I used #8 1 inch screws as
called for in the plans. The half round I made wasn't long enough so
a cut the ends at a angle and used two pieces on each side. Here is a
picture of the joint.
20-June-04 I've installed the starboard lower panel. Here is how I
did it. The first thing is that I realized the the measurments on the
plans correspond with the front stem, the fwd bulkhead, the joiner
and the transom. At these points you could drill your screw in from
the outside in. This would make the job a lot easier. I took the
measurments from the plans and marked them in at these points. I then
mounted the first piece of half round against the stem. I mounted it
without glue and drew a line around it. I then removed the half round
and marked where the screws would be going in on the outside of the
side panels. One screw every six inches. I then drilled guide holes
at these spots. I put glue where required between the stem and the
fwd bulkhead and put two screws through the rubrail and into the stem
and the fwd bulkhead. I did not put any other screws in this section.
I figured it was a small area, and it would be too difficult to put
any screws that went from the inside out. I then applied glue between
the fwd bulkhead and the joiner, and mounted this section of joiner
with screws going from the outside in at these points. I then went
into the cabin and put the other screws I had marked out through the
side panels and into the stringers as the plans called for. I then
got out of the boat and glued the rest the the area that needed to be
done. I could reach over and into the cockpit and hold the rest of
the rail in place with not problem. My half round was not long enough
so I had to do it in two piece. The short piece that went from the
end of the long piece to the transom was no problem mounting. There
was one section of the ½ round that would not sit flush to the
hull. I used a 1 inch screw instead of a ¾ inch screw at this
point to hold it in place. I went all the way through to the other
side, but once I put a couple of screws around it and the piece was
flush I could remove the inch long screw and replace it with another
¾ inche scrw.
24-Jun-04 Finished installing the rub rails and the ½ inch
round on the inside of the top rub rail. I ran into a problem
however. When I cut the stem the plans gave me the impression that
the stem was to be cut level with the top deck. However the plans
state that the ½ inch round on the inside of the rubrail was
to be angled to rest flush with the stem. That is not possible
because the stem does not stick up far enough. I could shape a piece
of wood to fill the area on top of the stem. However I think I will
leave the gap for the sprit to rest on between the rubrails.
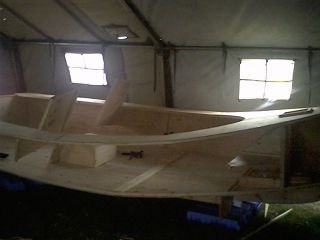
04-July-04
I've just finished putting in all the stringers for the seats. That
means there are no more holes that need to be cut through the hull. I
am ready to turn the boat to clean up the bottum, fibreglass and
paint. However I was looking through the plans and realized something
important. The Plans state that you do not need to install the rub
rails until after the motor mount is installed. Since the bottum
rubrail at the transom is one of the quides as too where the
fibreglass goes I will have to install this before anything else.
It is installed with the same curve as the top of the transom.
Because I have not installed the motor mounts yet it is simply a
matter of measuring from the top of the deck to the rear edge of the
side rubrail. Then drawing a series of dots the same distance from
the top of the transom. When your measuring from the middle part of
the transom where there is no top deck don't forget to subtract the
thickness of the top deck plywood from your measurments. Then put a
dot about ½ inch from your first mark. This is where you are
going to drill your guide hole from the outside of the transom. Then
glue and screw thourgh the transom and into your rubrail being
carefull to position your rubrail to follow the curve. In my case
the port side rubrail was slightly lower then the starboard side
rubrail so I had to do some carefull planning to get them to line up.